Monitoring System for Cold-Chain Operations
Handling the environmental conditions using sensors, air-conditioner IR signals and remote monitoring by sending data to the cloud.
Devices & Components
Arduino Uno Rev3
USB-A to Mini-USB Cable
Jumper wires (generic)
IR receiver (generic)
DHT11 Temperature & Humidity Sensor (3 pins)
NodeMcu
GPS Module (Generic)
Breadboard (generic)
IR receiver (generic)
USB-A to B Cable
Software & Tools
Arduino IDE
ThingSpeak API
Project description
Code
MATLAB Visualization with scaling
matlab
This is a different version of the previous one. The marks on the map are as big as the value of a variable that we choose. In this case, the mark is as big as the value of temperature. For easy testing we could send data manually to our ThingSpeak variables through the browser: https://api.thingspeak.com/update?api_key=yourWriteAPIKey&field4=?&field3=?&field1=?
Sending email alerts in case of wrong temperature.
arduino
We will add the function of sending email in case the temperature is different than 20 ° C. To perform this function we will create a new gmail account which will be the sender. So, in case we have a different value than 20 ° C in the loop we have created, an email will be sent from the new email alert account through the NodeMCU.
GPS Tracking with NodeMCU and MATLAB Visualization
matlab
In ThingSpeak we can create Map Visualizations in order to track the location of a cargo at a specific time. We create MATLAB Visualization and through code we can choose which variables to show(e.g. Temperature), including the Latitude and Longitude variables for printing a mark on the map. For easy testing we could send data manually to our ThingSpeak variables through the browser: https://api.thingspeak.com/update?api_key=yourWriteAPIKey&field4=?&field3=?&field1=?
Connecting NodeMcu to WiFi and sending data to the Cloud.
arduino
This code first connects NodeMcu to WiFi and then sends the data to the ThingSpeak page. At https://thingspeak.com/ we can create a Channel that will have its own fields, graphs and API keys so we can do our own updates. So in the code we need to add the WiFi name and code as well as the Channel ID and the Write API Key of ThingSpeak. Finally, we upload the code to NodeMcu by selecting "NodeMCU 1.0 (ESP-12E Module)" as a board tool.
Handling the room temperature by sending IR signal to turn on/off the air-conditioner
arduino
We set specific temperature values and check the ambient conditions through the DHT temperature and humidity sensor. We have set as desired room temperature the 20 ° C and the signal is sent per minute. If the conditions are not what we need, the Arduino board via IR Transmitter sends the appropriate signal either to turn on or off the air conditioning.
Decoding the IR signal for air-conditioner
arduino
We decode the IR signal sent by the remote controller of air-conditioner. We press the buttons ON and OFF and the IR Receiver will receive this signal which after that is decoded in order to send it back again afterwards.
Handling the room temperature by sending IR signal to turn on/off the air-conditioner
arduino
We set specific temperature values and check the ambient conditions through the DHT temperature and humidity sensor. We have set as desired room temperature the 20 ° C and the signal is sent per minute. If the conditions are not what we need, the Arduino board via IR Transmitter sends the appropriate signal either to turn on or off the air conditioning.
MATLAB Visualization with scaling
matlab
This is a different version of the previous one. The marks on the map are as big as the value of a variable that we choose. In this case, the mark is as big as the value of temperature. For easy testing we could send data manually to our ThingSpeak variables through the browser: https://api.thingspeak.com/update?api_key=yourWriteAPIKey&field4=?&field3=?&field1=?
Printing Temperature and Humidity
arduino
Printing the room Temperature and Humidity values from DHT11 sensor in the Arduino IDE serial monitor.
Printing Temperature and Humidity
arduino
Printing the room Temperature and Humidity values from DHT11 sensor in the Arduino IDE serial monitor.
Sending email alerts in case of wrong temperature.
arduino
We will add the function of sending email in case the temperature is different than 20 ° C. To perform this function we will create a new gmail account which will be the sender. So, in case we have a different value than 20 ° C in the loop we have created, an email will be sent from the new email alert account through the NodeMCU.
GPS Tracking with NodeMCU and MATLAB Visualization
matlab
In ThingSpeak we can create Map Visualizations in order to track the location of a cargo at a specific time. We create MATLAB Visualization and through code we can choose which variables to show(e.g. Temperature), including the Latitude and Longitude variables for printing a mark on the map. For easy testing we could send data manually to our ThingSpeak variables through the browser: https://api.thingspeak.com/update?api_key=yourWriteAPIKey&field4=?&field3=?&field1=?
Connecting NodeMcu to WiFi and sending data to the Cloud.
arduino
This code first connects NodeMcu to WiFi and then sends the data to the ThingSpeak page. At https://thingspeak.com/ we can create a Channel that will have its own fields, graphs and API keys so we can do our own updates. So in the code we need to add the WiFi name and code as well as the Channel ID and the Write API Key of ThingSpeak. Finally, we upload the code to NodeMcu by selecting "NodeMCU 1.0 (ESP-12E Module)" as a board tool.
Downloadable files
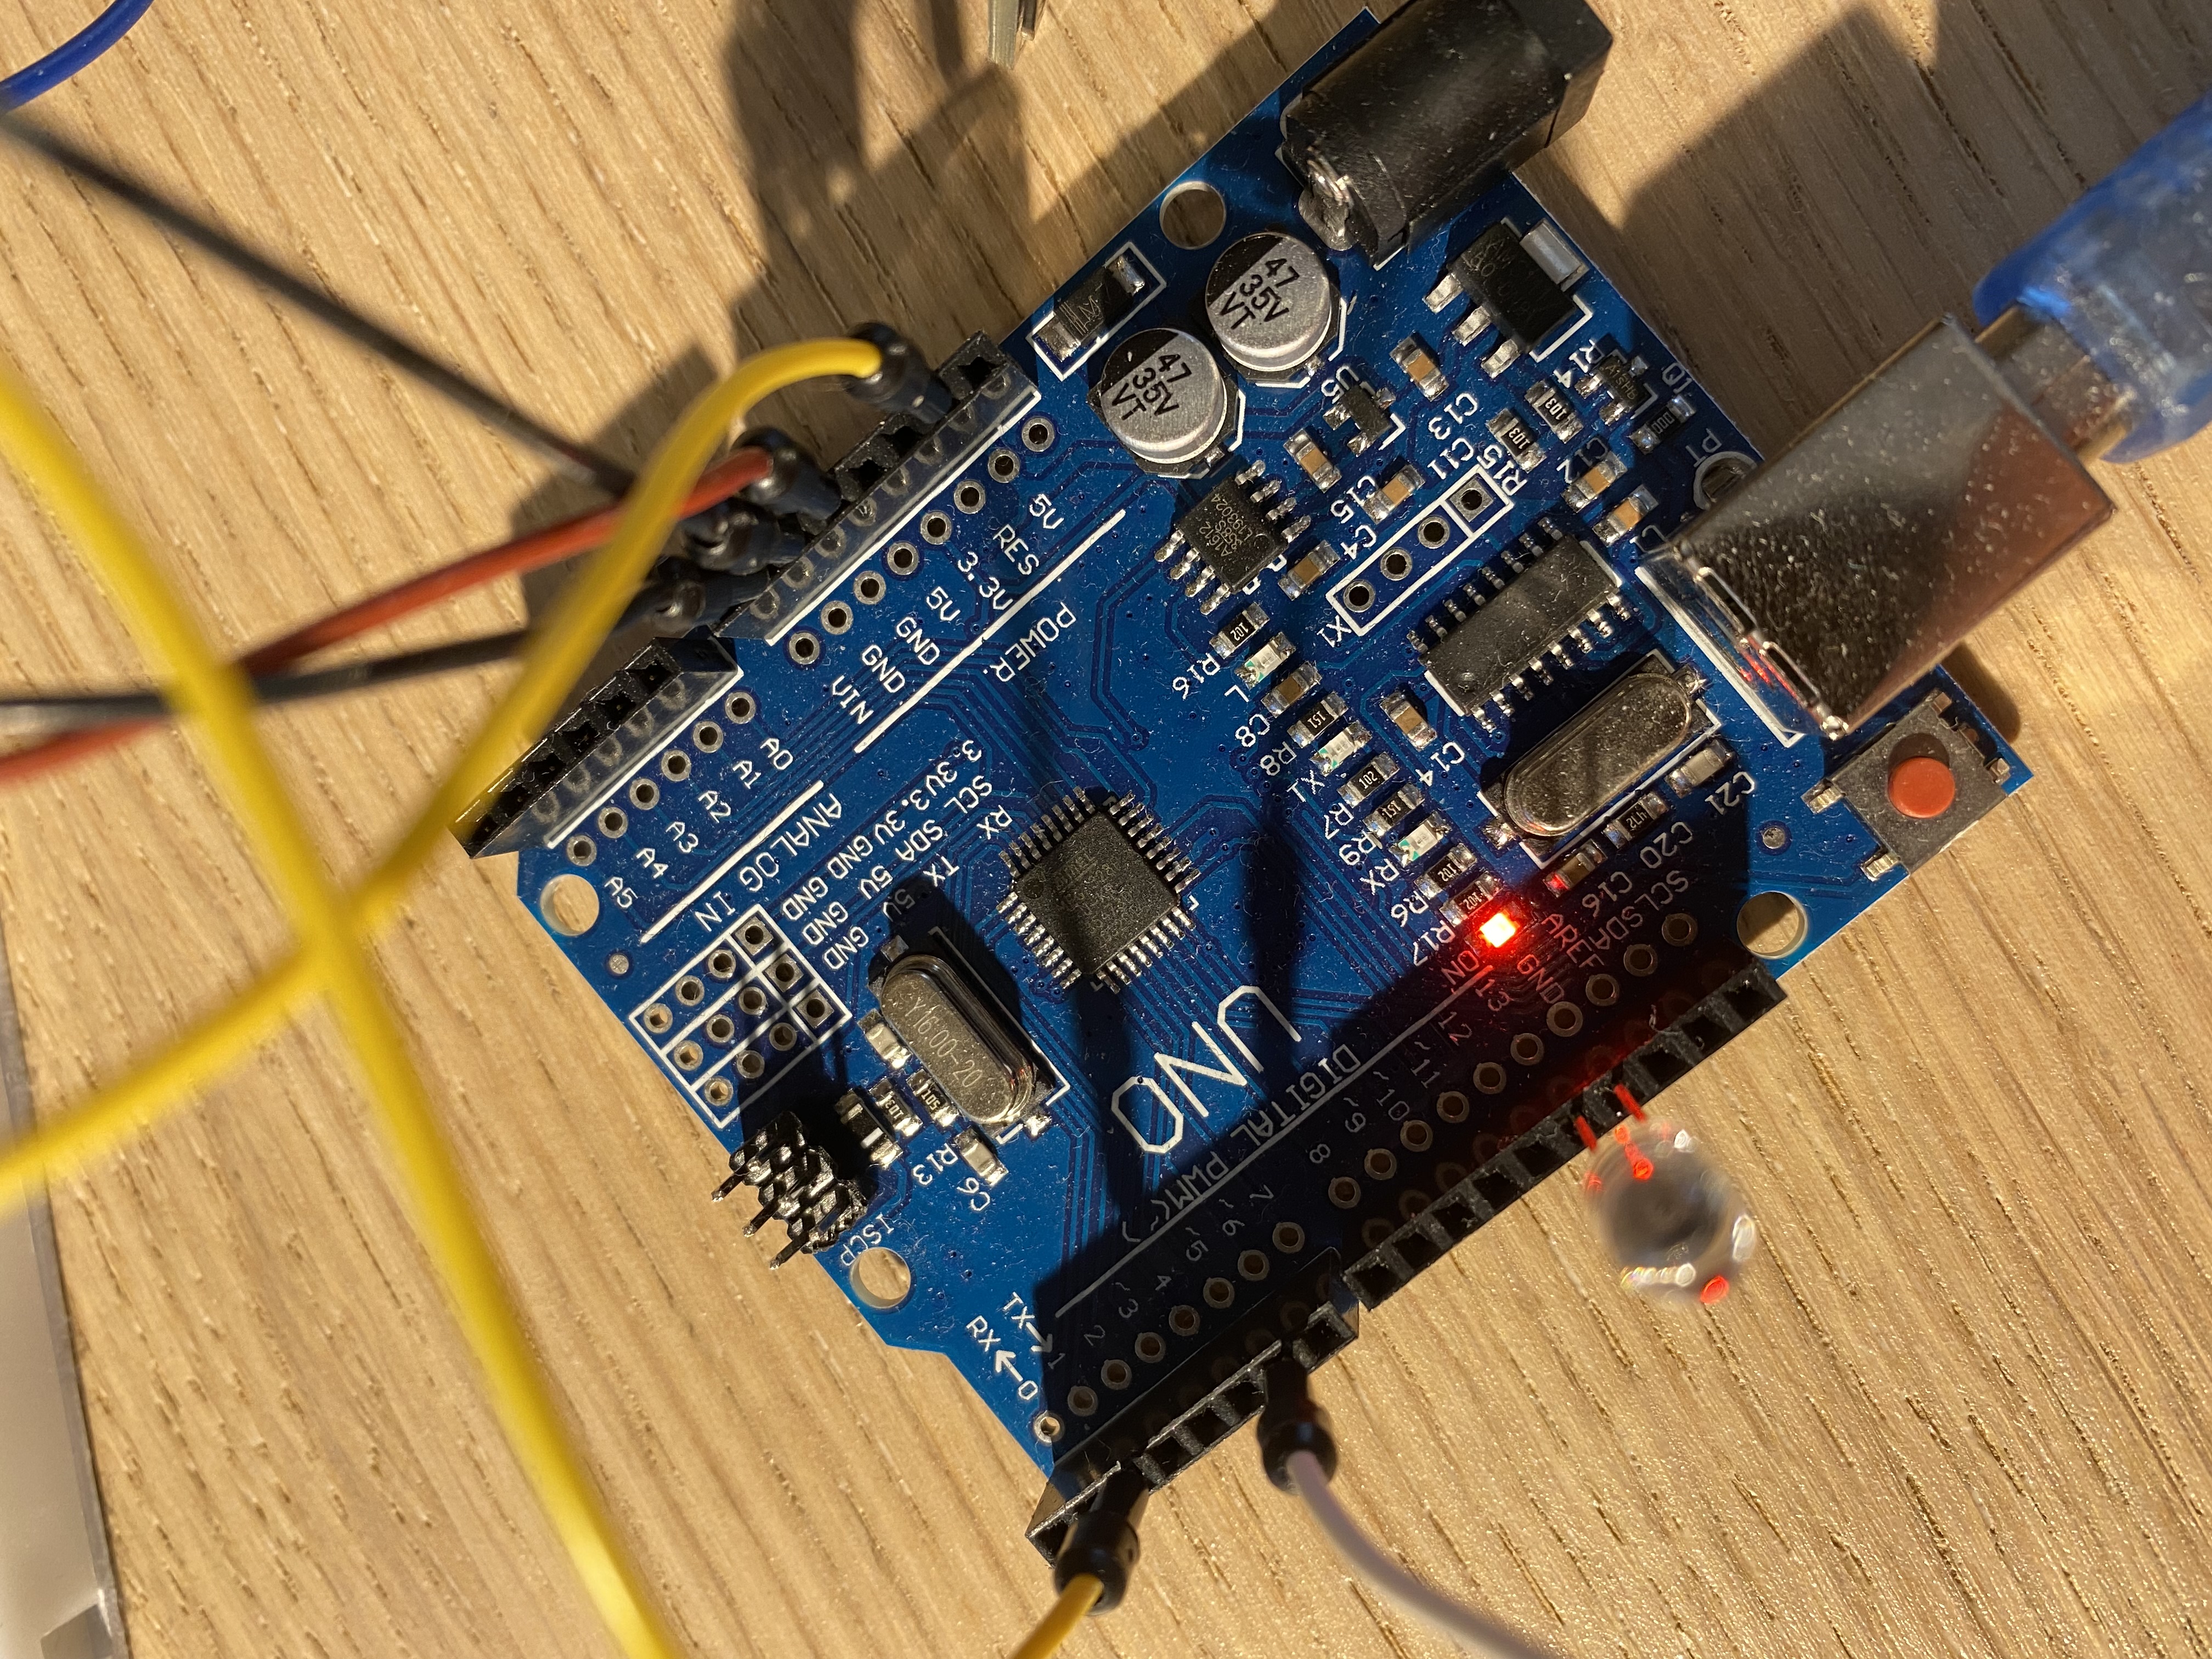
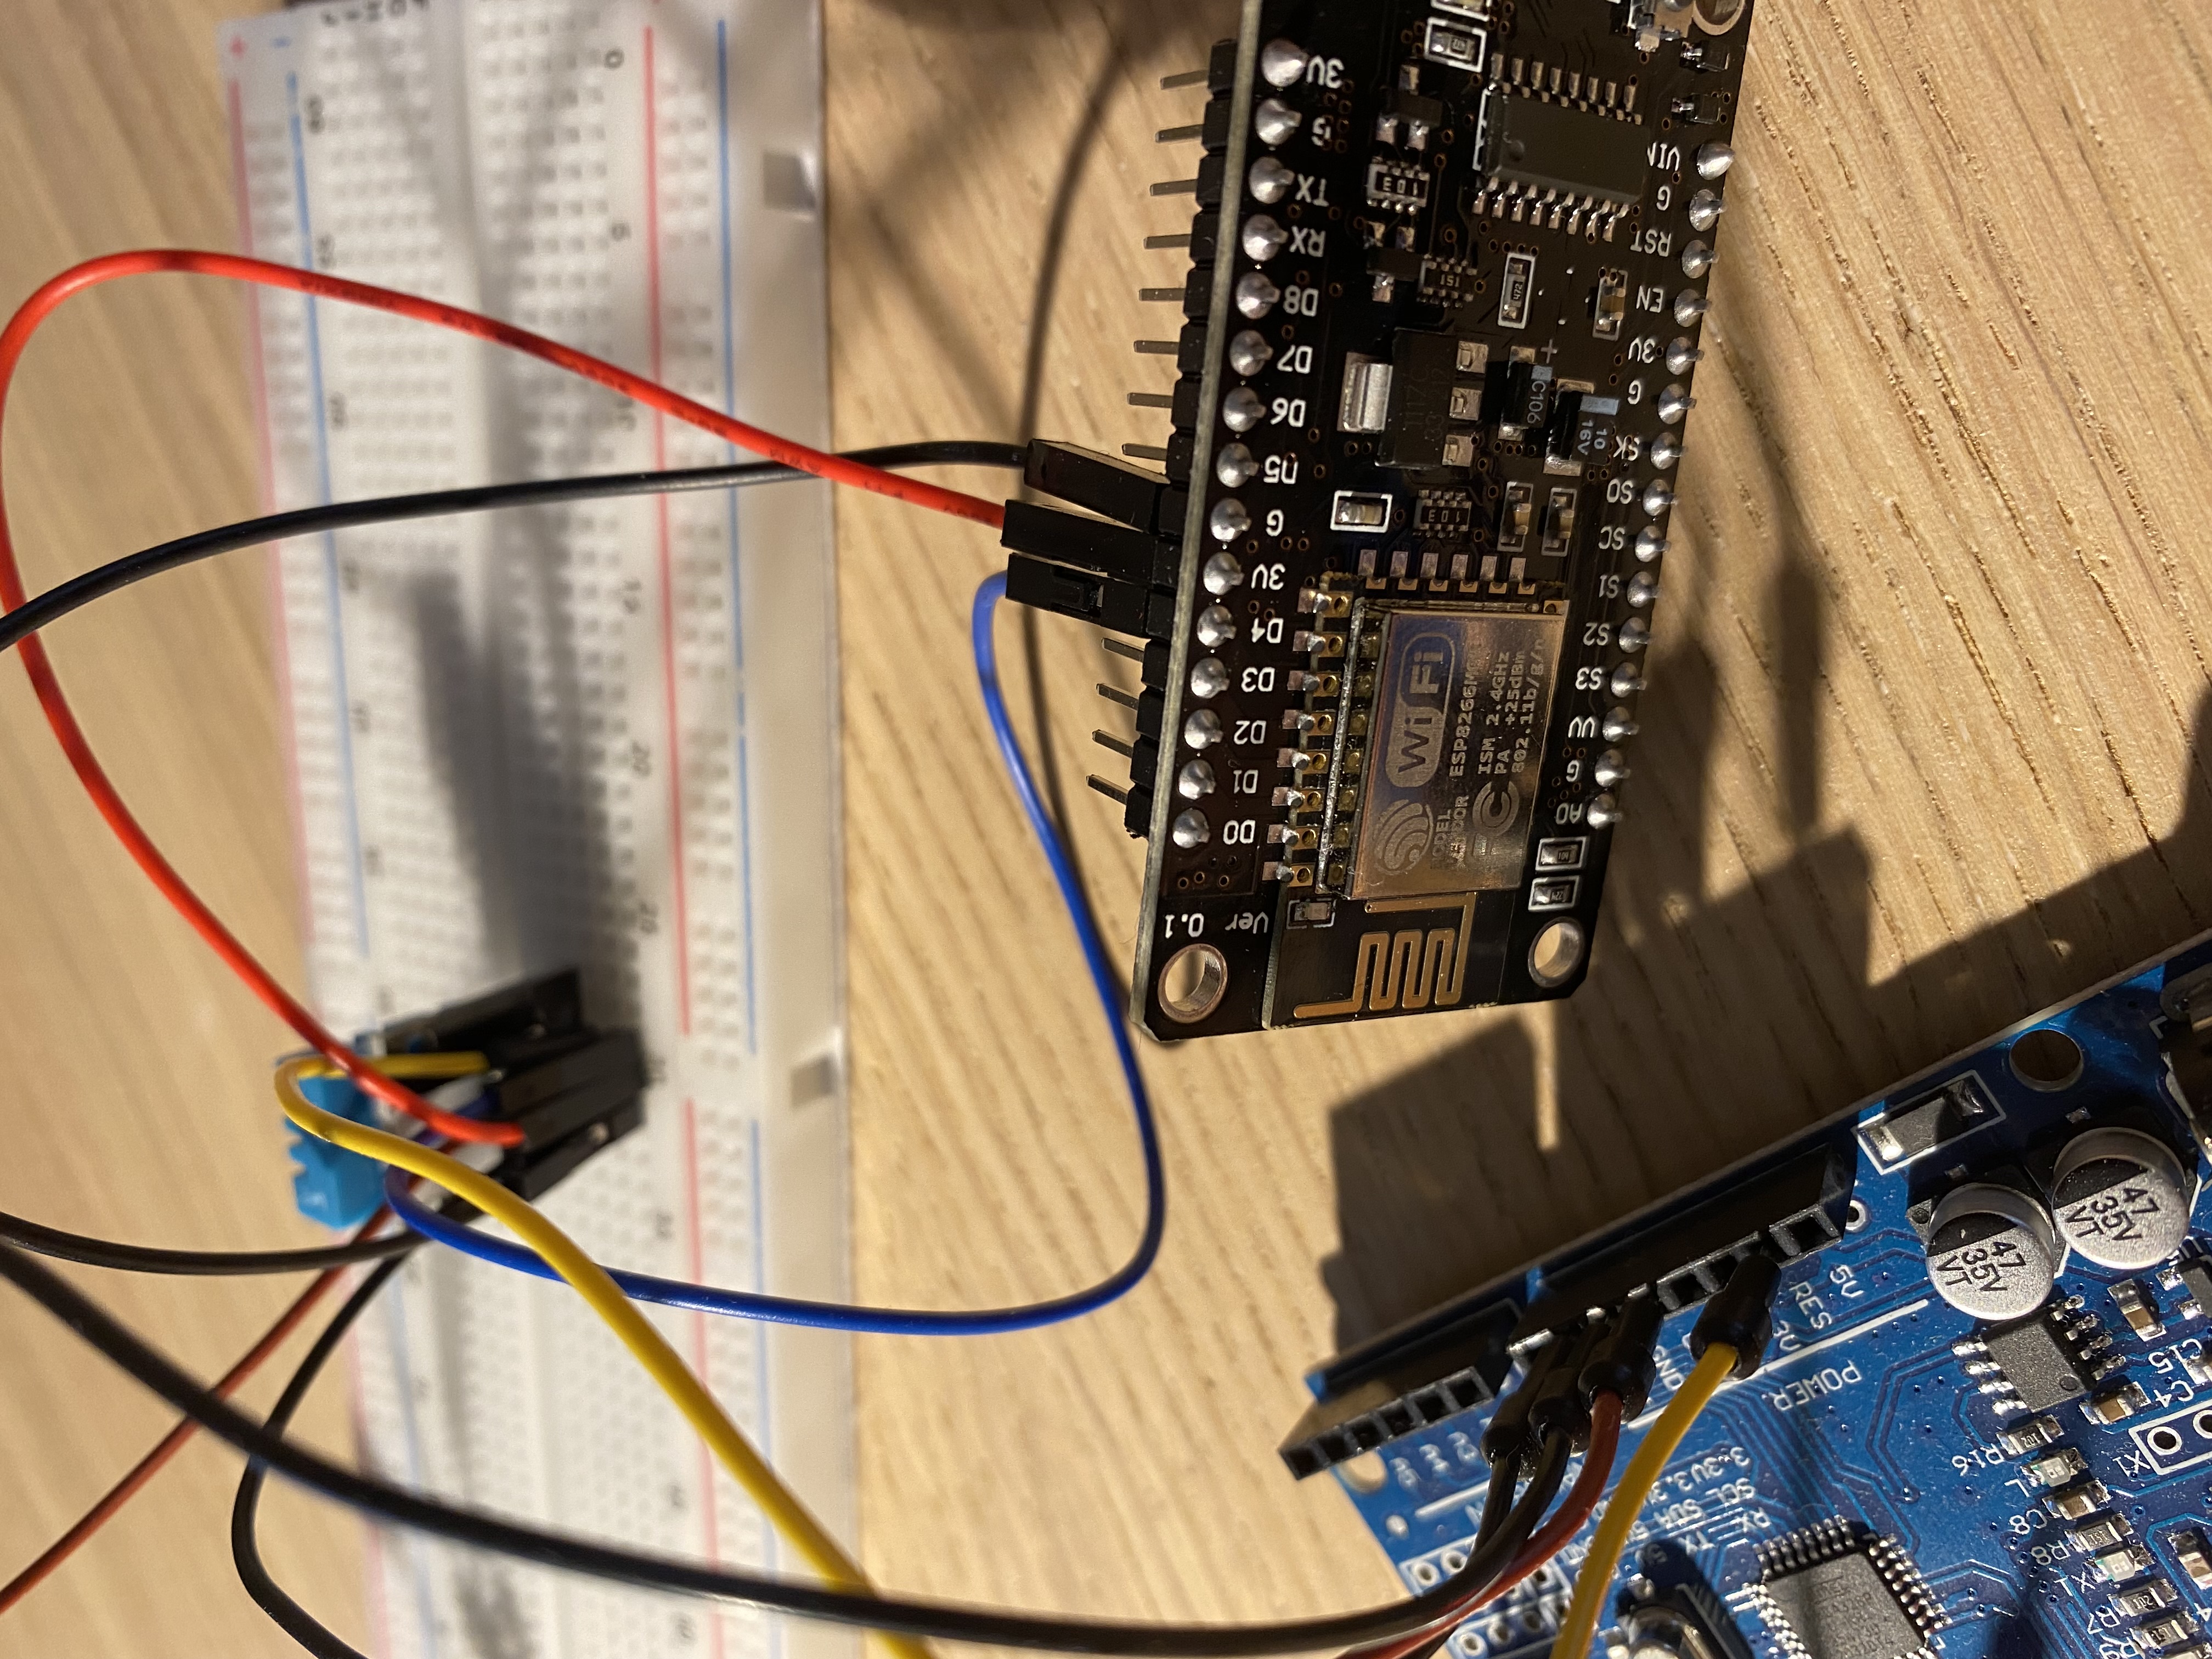
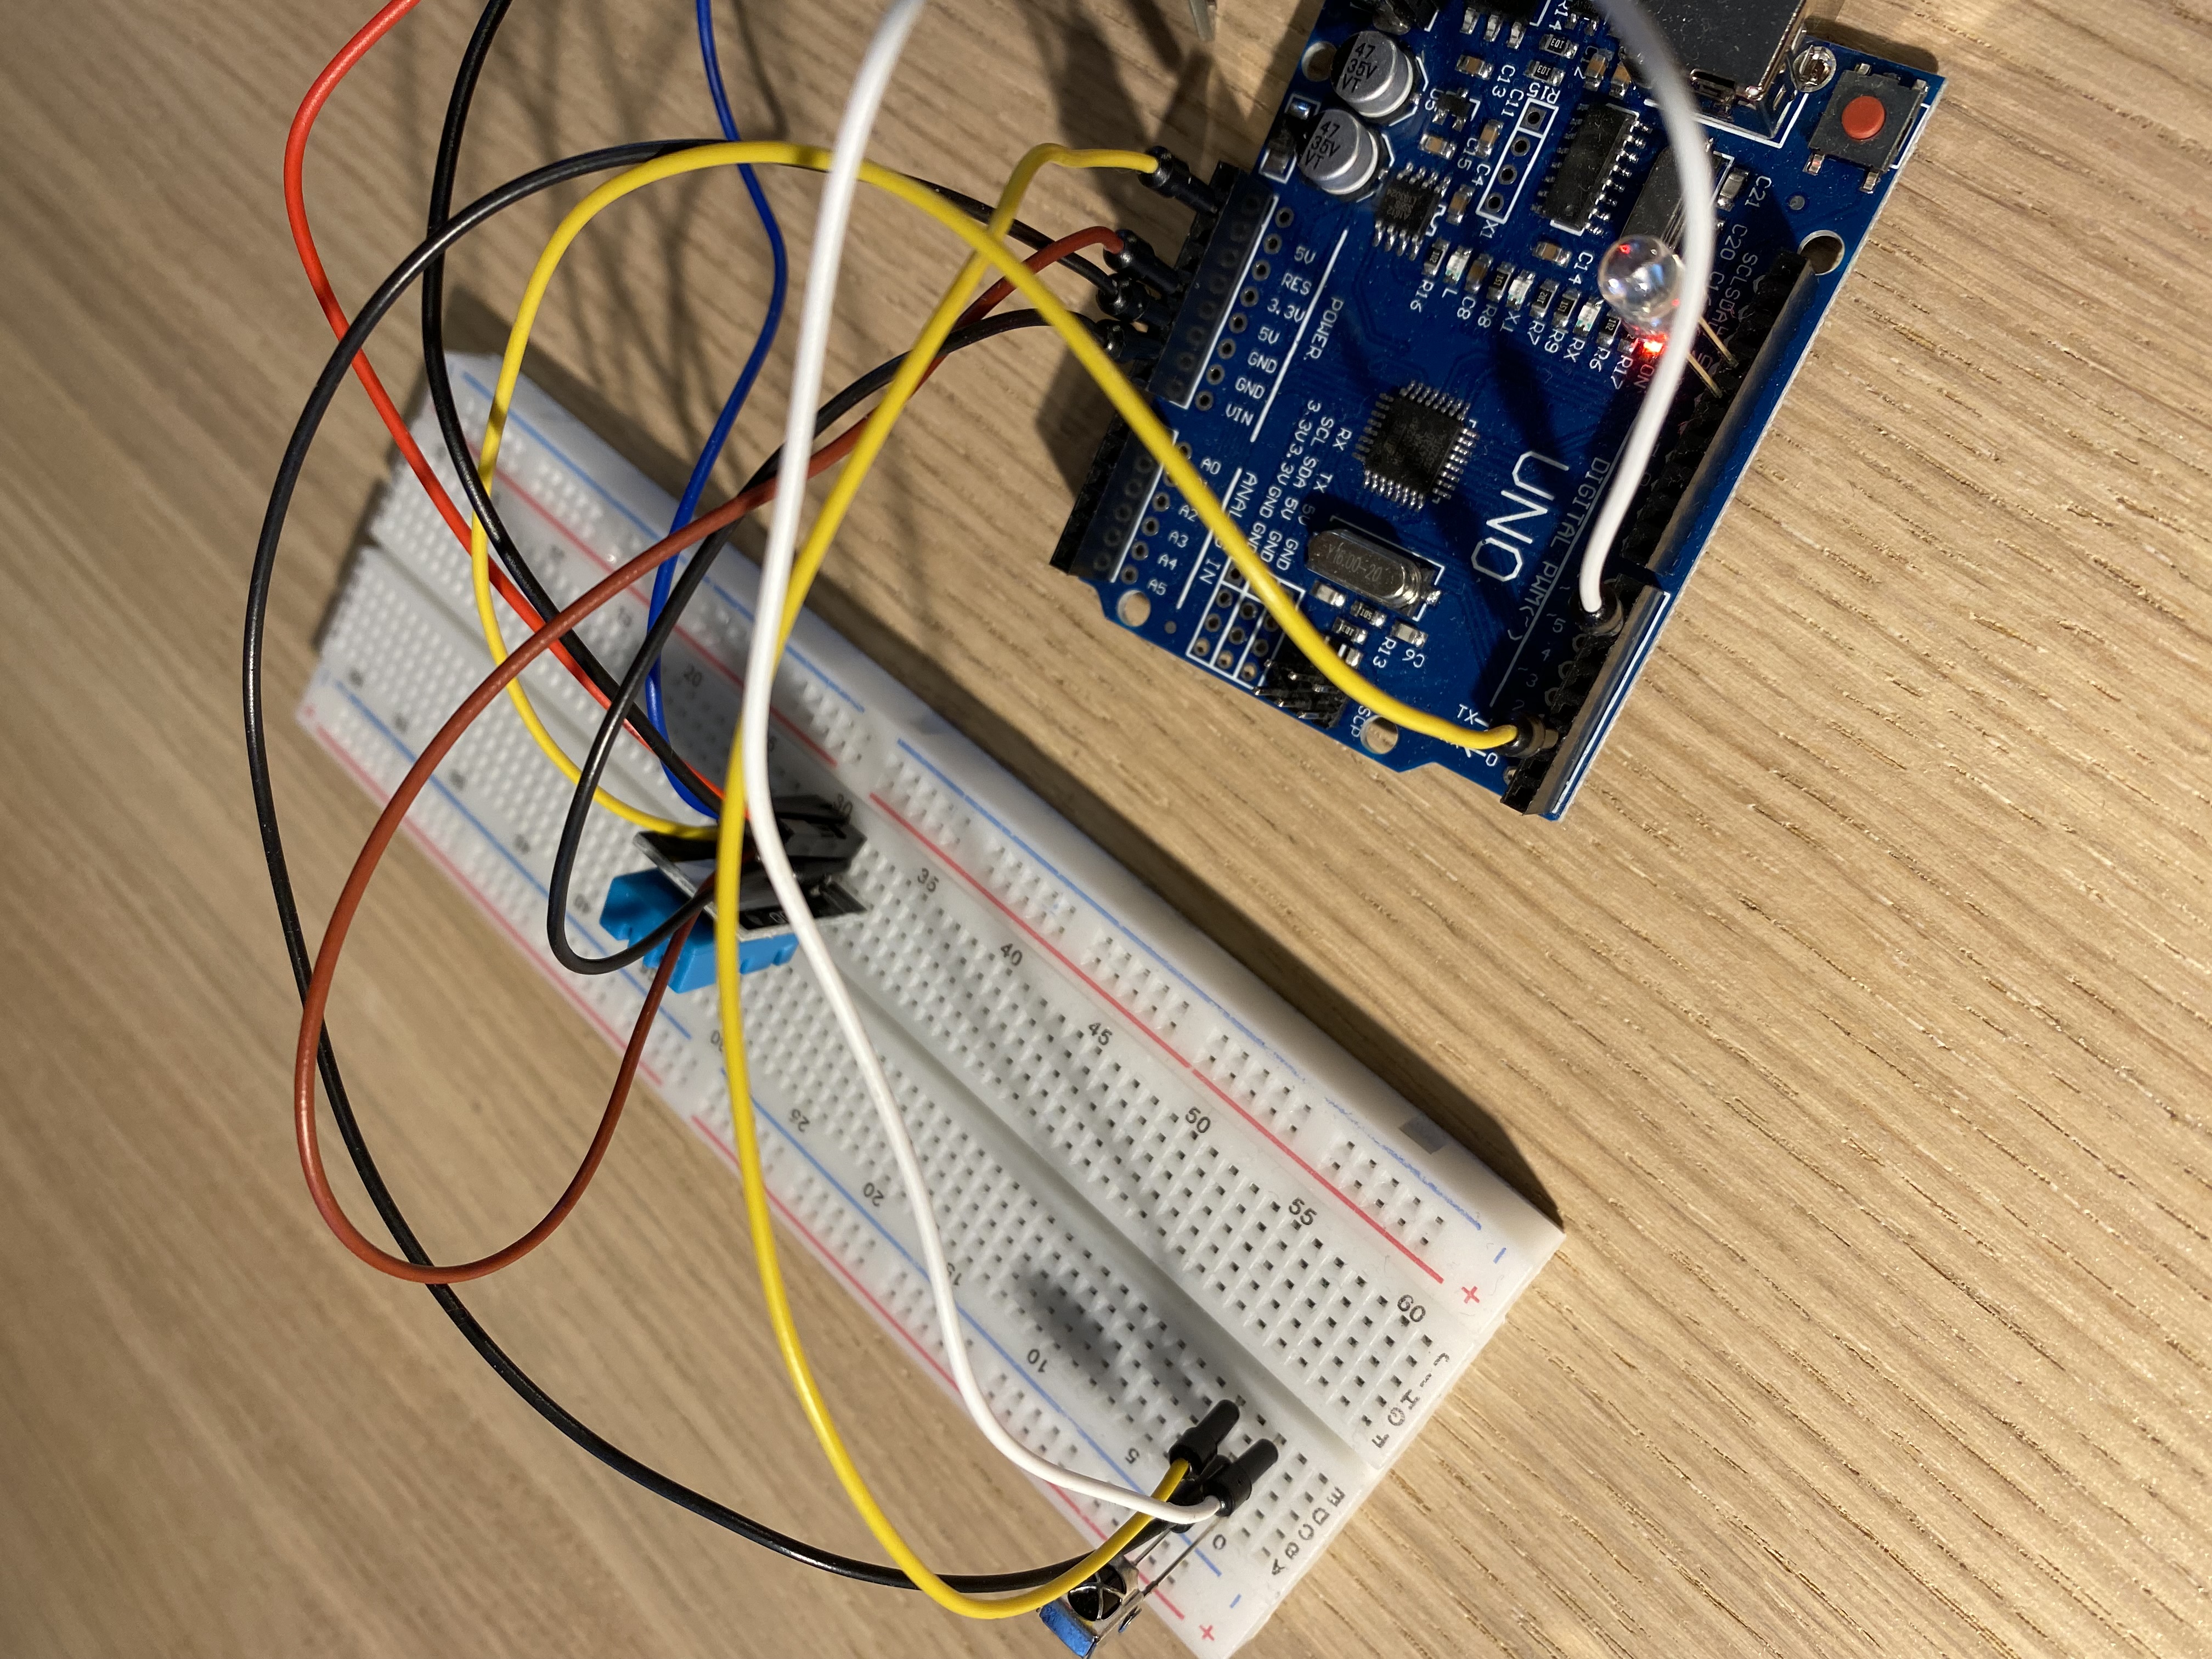
A closer look to the connections.
A closer look to the connections.
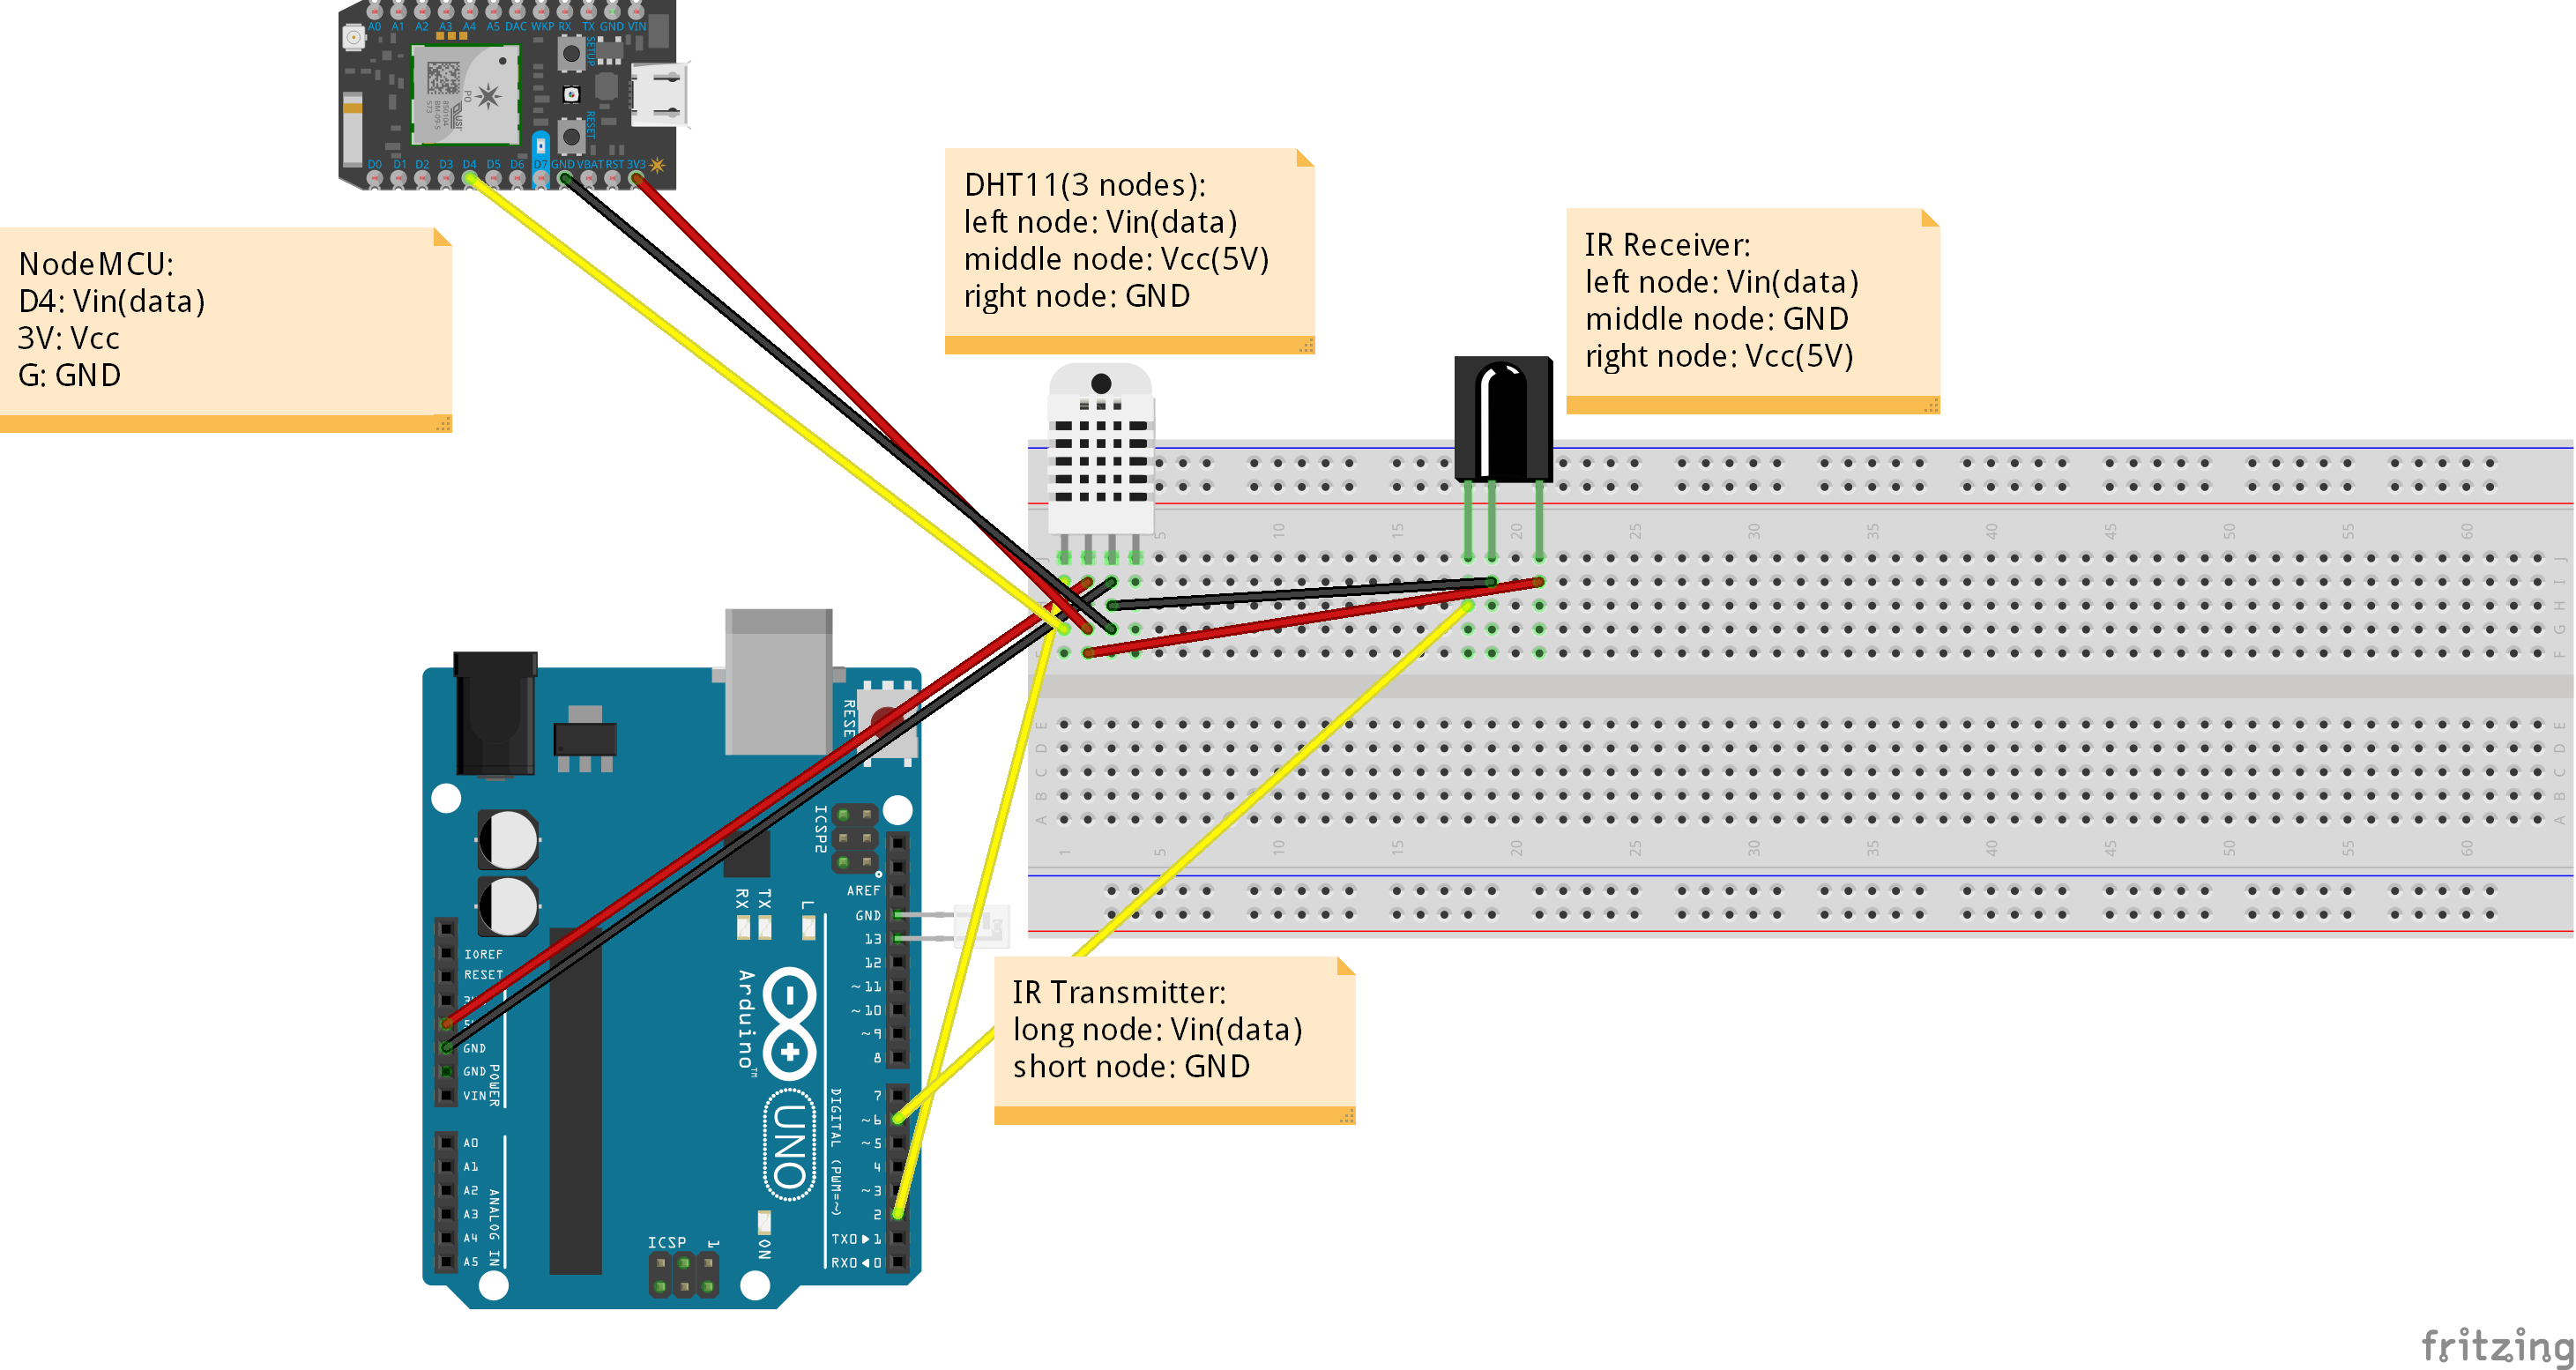
Circuit Diagram
Some hardware is shown different in the image from what I used. For example my DHT11 Sensor has three nodes instead of four like in the image and the NodeMCU I used is different than the "Photon" board in the image. But the connections are the same, just in a different position. You can easily just connect the wires in your corresponding Vcc or GND. What's more, you don't need to make all the connections of the NodeMCU like I did because the DHT11 sensor already is connected to GND and Vcc. I did all the three connections needed though, in case someone wanted to use the DHT11 sensor without sending the values to the Arduino board. I provide more explanations in the code section.
Circuit Diagram
A closer look to the connections.
A closer look to the connections.
A closer look to the connections.
A closer look to the connections.
A closer look to the connections.
A closer look to the connections.
A closer look to the connections.
A closer look to the connections.
Circuit Diagram
Some hardware is shown different in the image from what I used. For example my DHT11 Sensor has three nodes instead of four like in the image and the NodeMCU I used is different than the "Photon" board in the image. But the connections are the same, just in a different position. You can easily just connect the wires in your corresponding Vcc or GND. What's more, you don't need to make all the connections of the NodeMCU like I did because the DHT11 sensor already is connected to GND and Vcc. I did all the three connections needed though, in case someone wanted to use the DHT11 sensor without sending the values to the Arduino board. I provide more explanations in the code section.
Circuit Diagram
A closer look to the connections.
A closer look to the connections.
Comments
Only logged in users can leave comments