433mhz and WiFi Connected Amazon Alexa Hub
This device can be incorporated in a home to connect up to 3 available Amazon Alexa's on the same WiFi network.
Devices & Components
Arduino Uno Rev3
Buzzer
Jumper wires (generic)
Resistor 330 ohm
433mhz Transmitter and Receiver
Resistor 10k ohm
LED (generic)
Breadboard (generic)
Software & Tools
Arduino IDE
Project description
Code
Transmitter & Receiver Hub Code
c_cpp
Make sure to check that the pins match and then upload and press the button on your breadboard! it will scan for and connect multiple devices to the central Arduino. Now, when you use Alexa, one/two of the pair or trio will be accessing the cloud while the other just relays the information, reducing time.
Downloadable files
Arduino w/ all Components
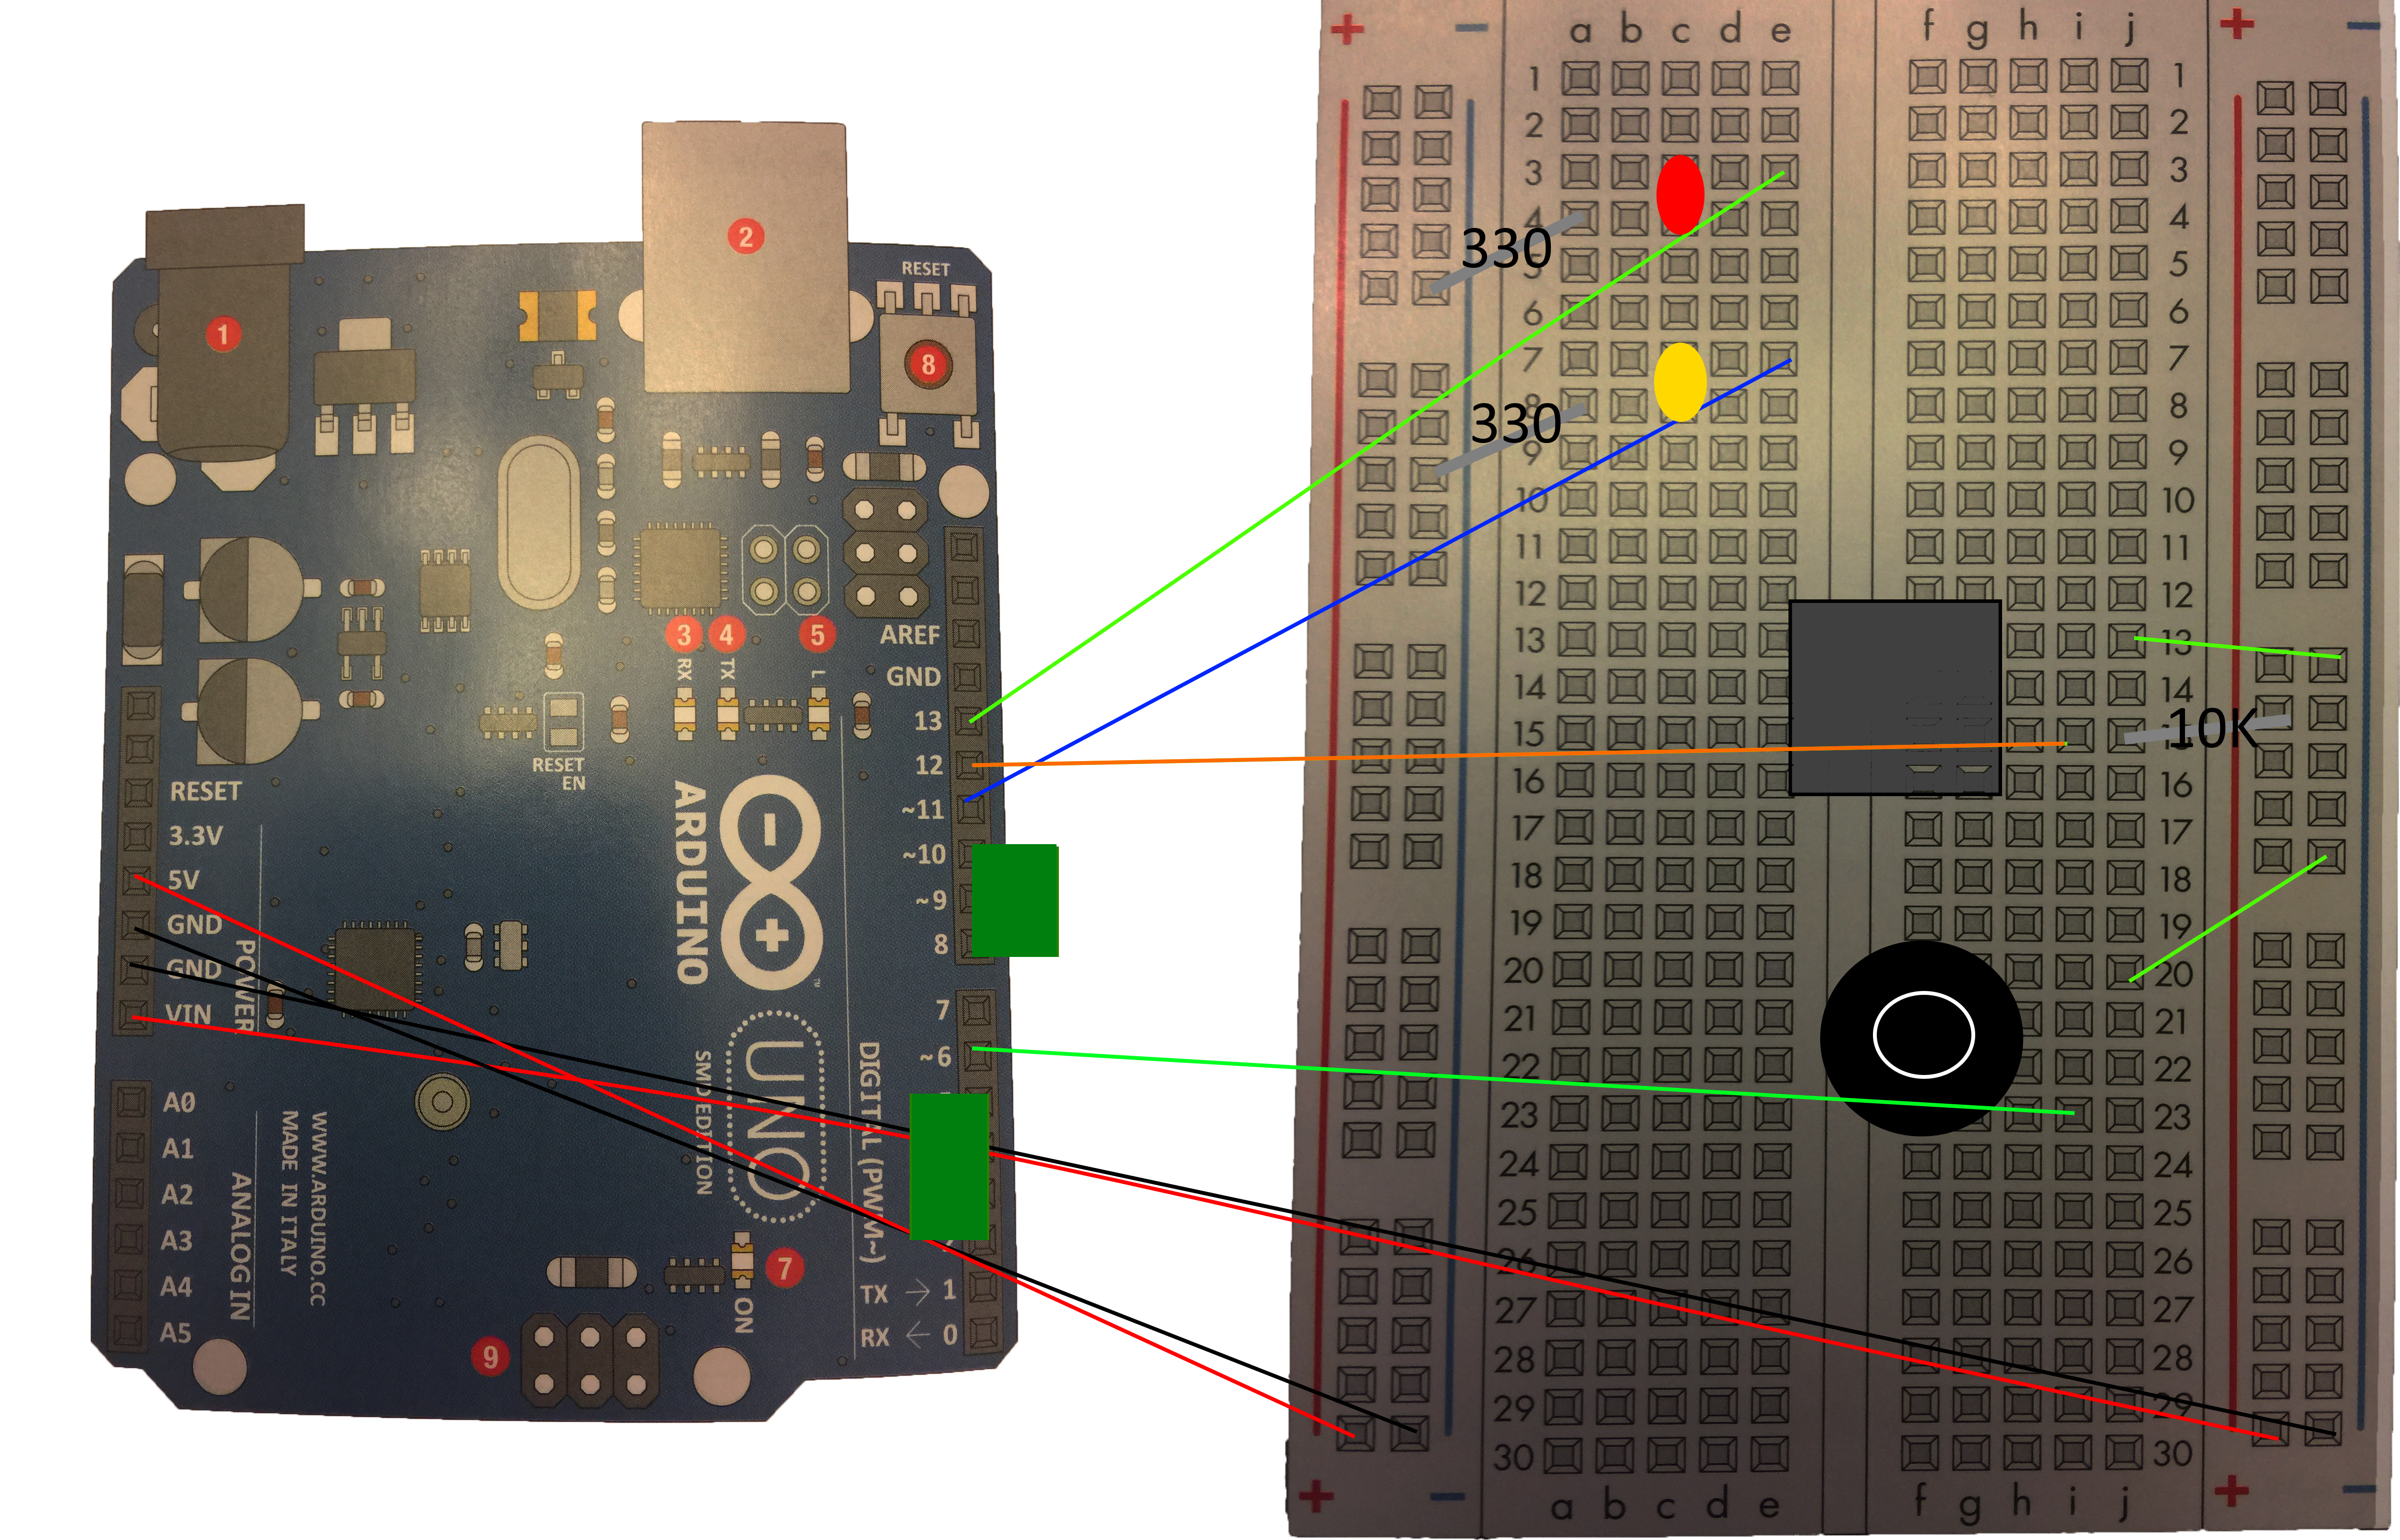
The diagram labels how to connect all the pins and components between the Arduino and breadboard, as well as the resistors.
Arduino w/ all Components
Arduino w/ all Components
The diagram labels how to connect all the pins and components between the Arduino and breadboard, as well as the resistors.
Arduino w/ all Components
Documentation
No File
No File

Comments
Only logged in users can leave comments