Devices & Components
Arduino Micro
8BitCADE XL DIY Kit
Tactile Switch, Top Actuated
JLCPCB Customized PCB
Pro Micro - 5V/16MHz
Hardware & Tools
Soldering iron (generic)
Multitool, Screwdriver
Solder Wire, Lead Free
Software & Tools
Arduino IDE
Project description
Code
8BitCADE_Hardware_Test.ino
arduino
The 8BitCADE XL hardware test. To download it, head on over to the 8bitcade website at 8bitcade.com/resources If you want to check out more code for the 8bitcade, the games can be accessed at 8bitcade.com/game and if you want to learn to program using Arduino, head over to 8bitcade.com/learn
Github! 8BitCADE Calculator!
See our GitHub repo that will be growing over time! Here you can find the Calculator that actually has a tutorial written about it! Check it out at 8bitcade.com/learn
8BitCADE_Hardware_Test.ino
arduino
The 8BitCADE XL hardware test. To download it, head on over to the 8bitcade website at 8bitcade.com/resources If you want to check out more code for the 8bitcade, the games can be accessed at 8bitcade.com/game and if you want to learn to program using Arduino, head over to 8bitcade.com/learn
Downloadable files
8BitCADE XL Schematic
We are open source!
8BitCADE XL Schematic
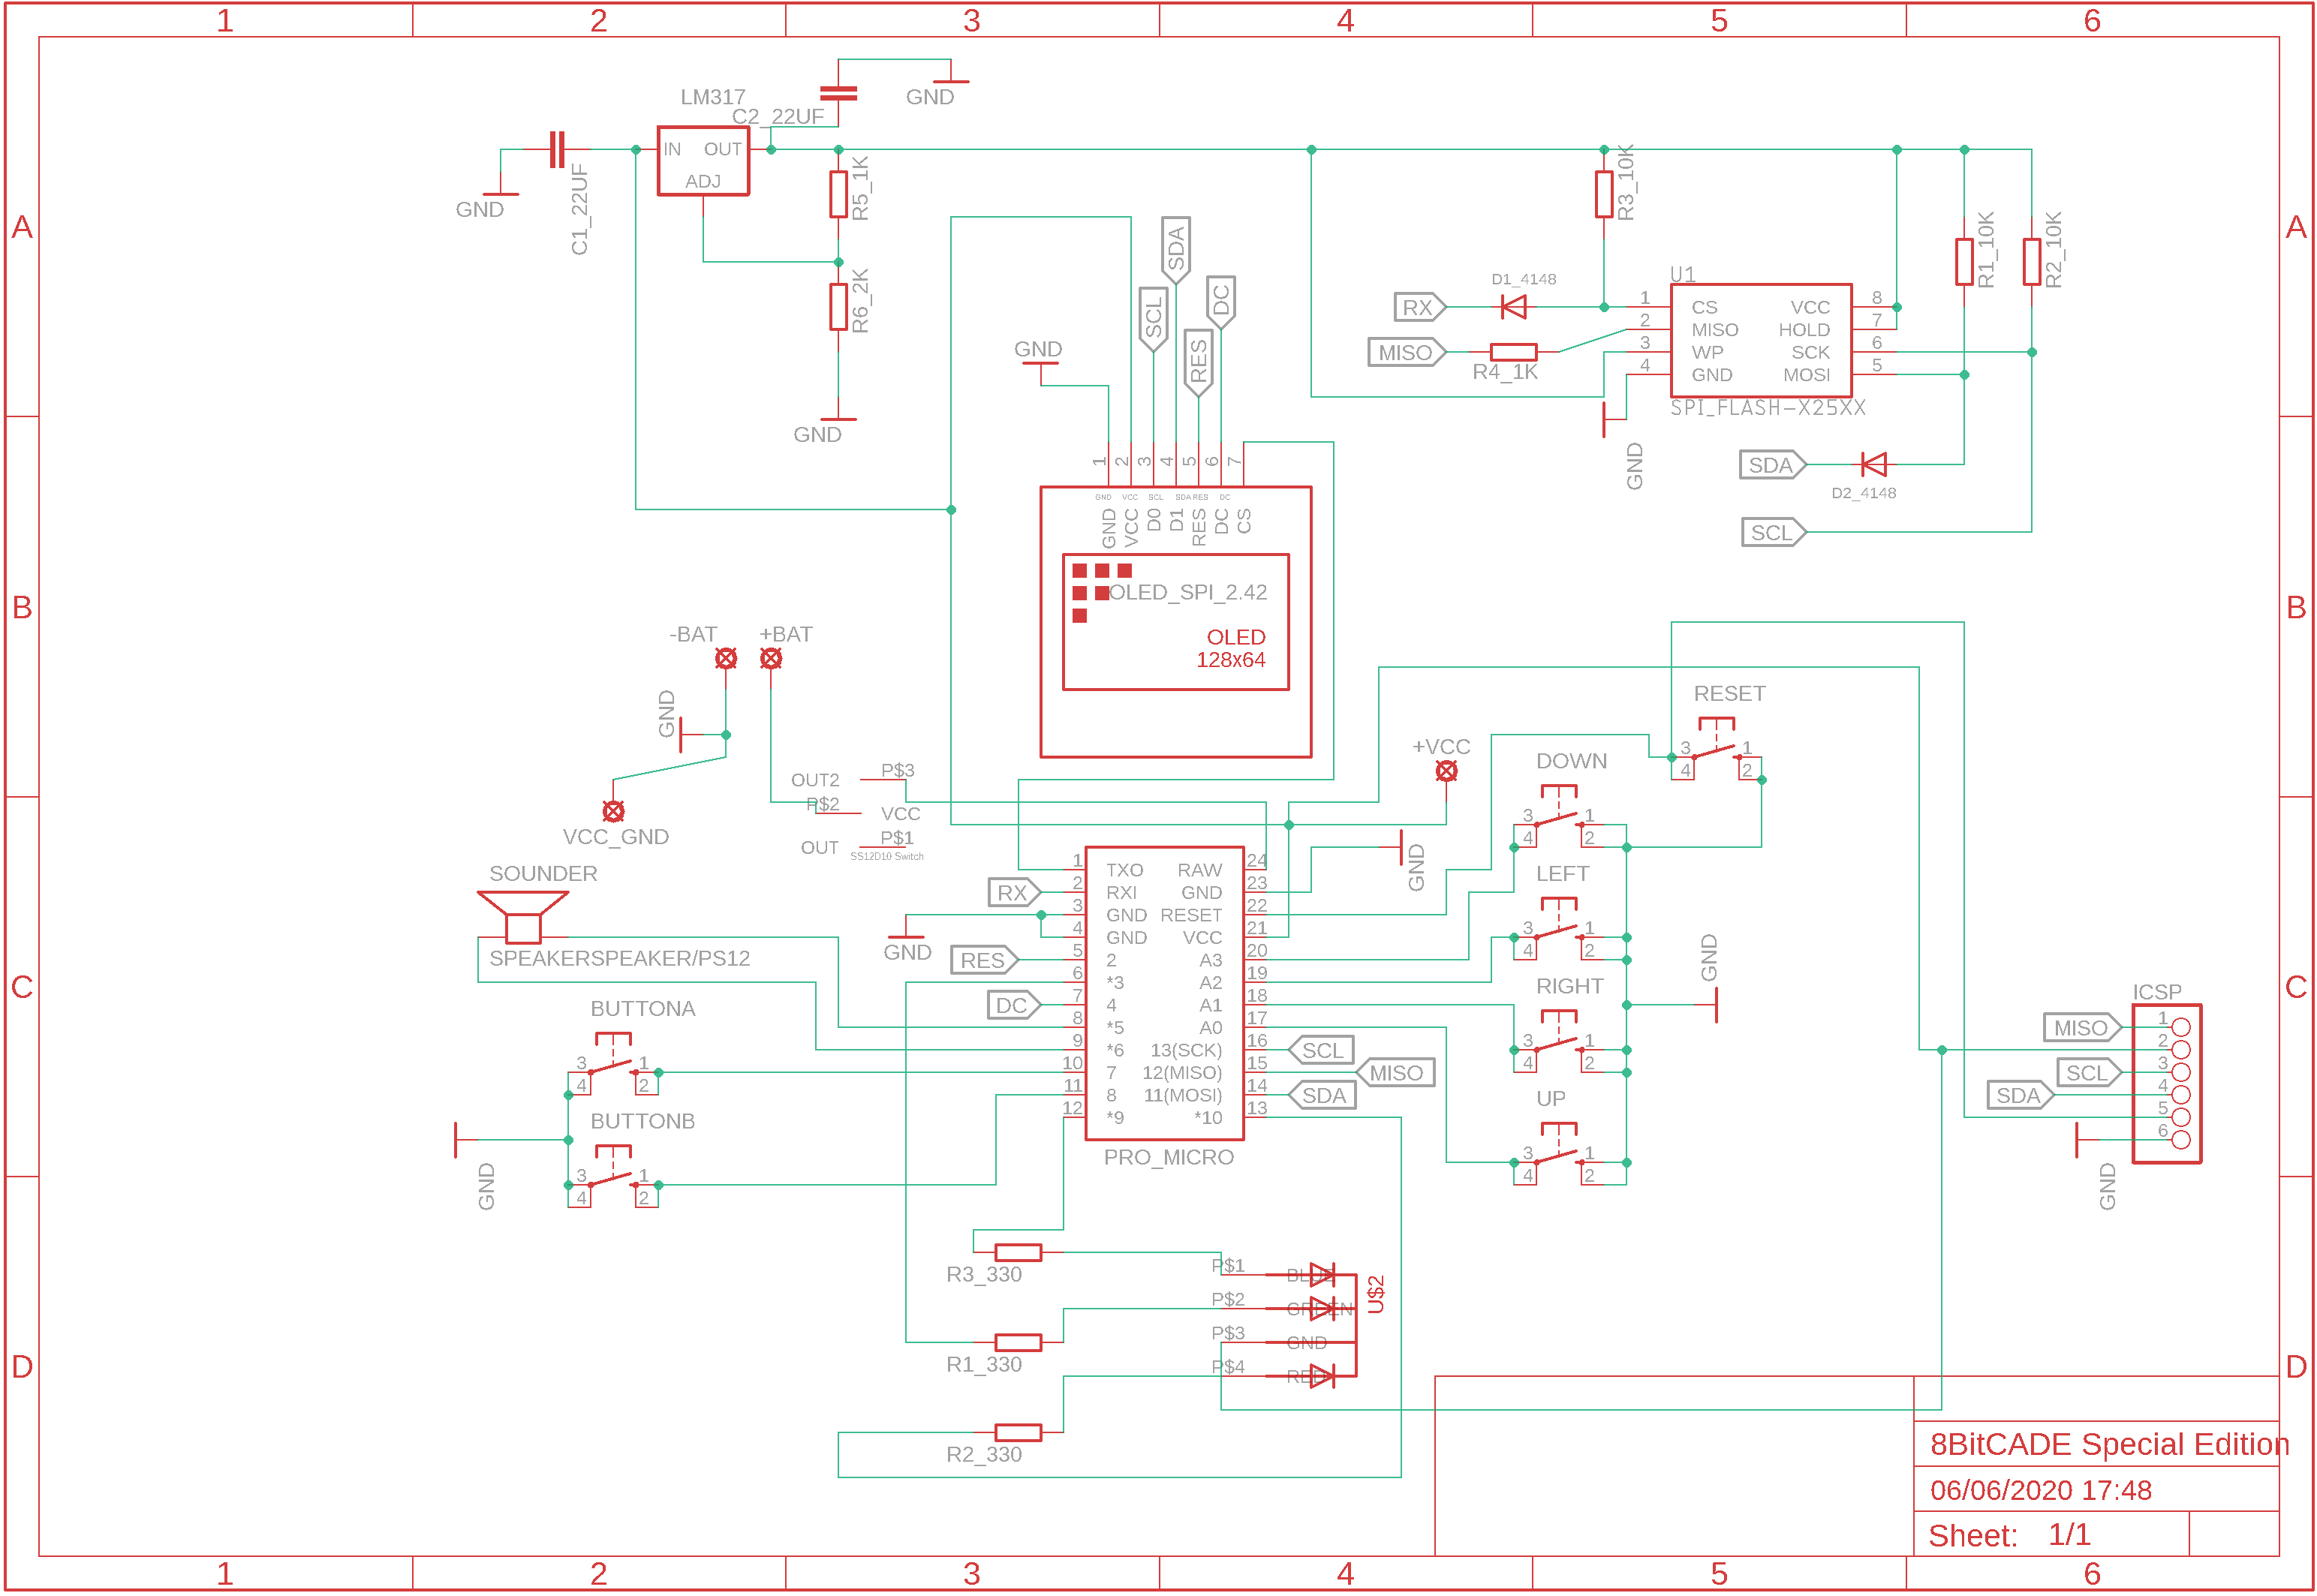
8BitCADE XL Schematic
We are open source!
8BitCADE XL Schematic
Comments
Only logged in users can leave comments