8BitCADE Level UP - A Fun Handheld Gaming Console
A fun handheld gaming console based on the Arduboy consoles used to teach 1 bit game development & basics of code!
Devices & Components
1
Pro Micro - 5V/16MHz
1
Arduino LCD Screen
1
Tactile Switch, Top Actuated
1
Arduboy Compatible
1
8BitCADE Level UP
1
JLCPCB Customized PCB
Hardware & Tools
1
3D Printer (generic)
Software & Tools
1
Arduino Web Editor
Project description
Code
8BitCADE_Hardware_Test.ino
arduino
Hardware test!
Downloadable files
Level UP Schematic
Scheme
Level UP Schematic
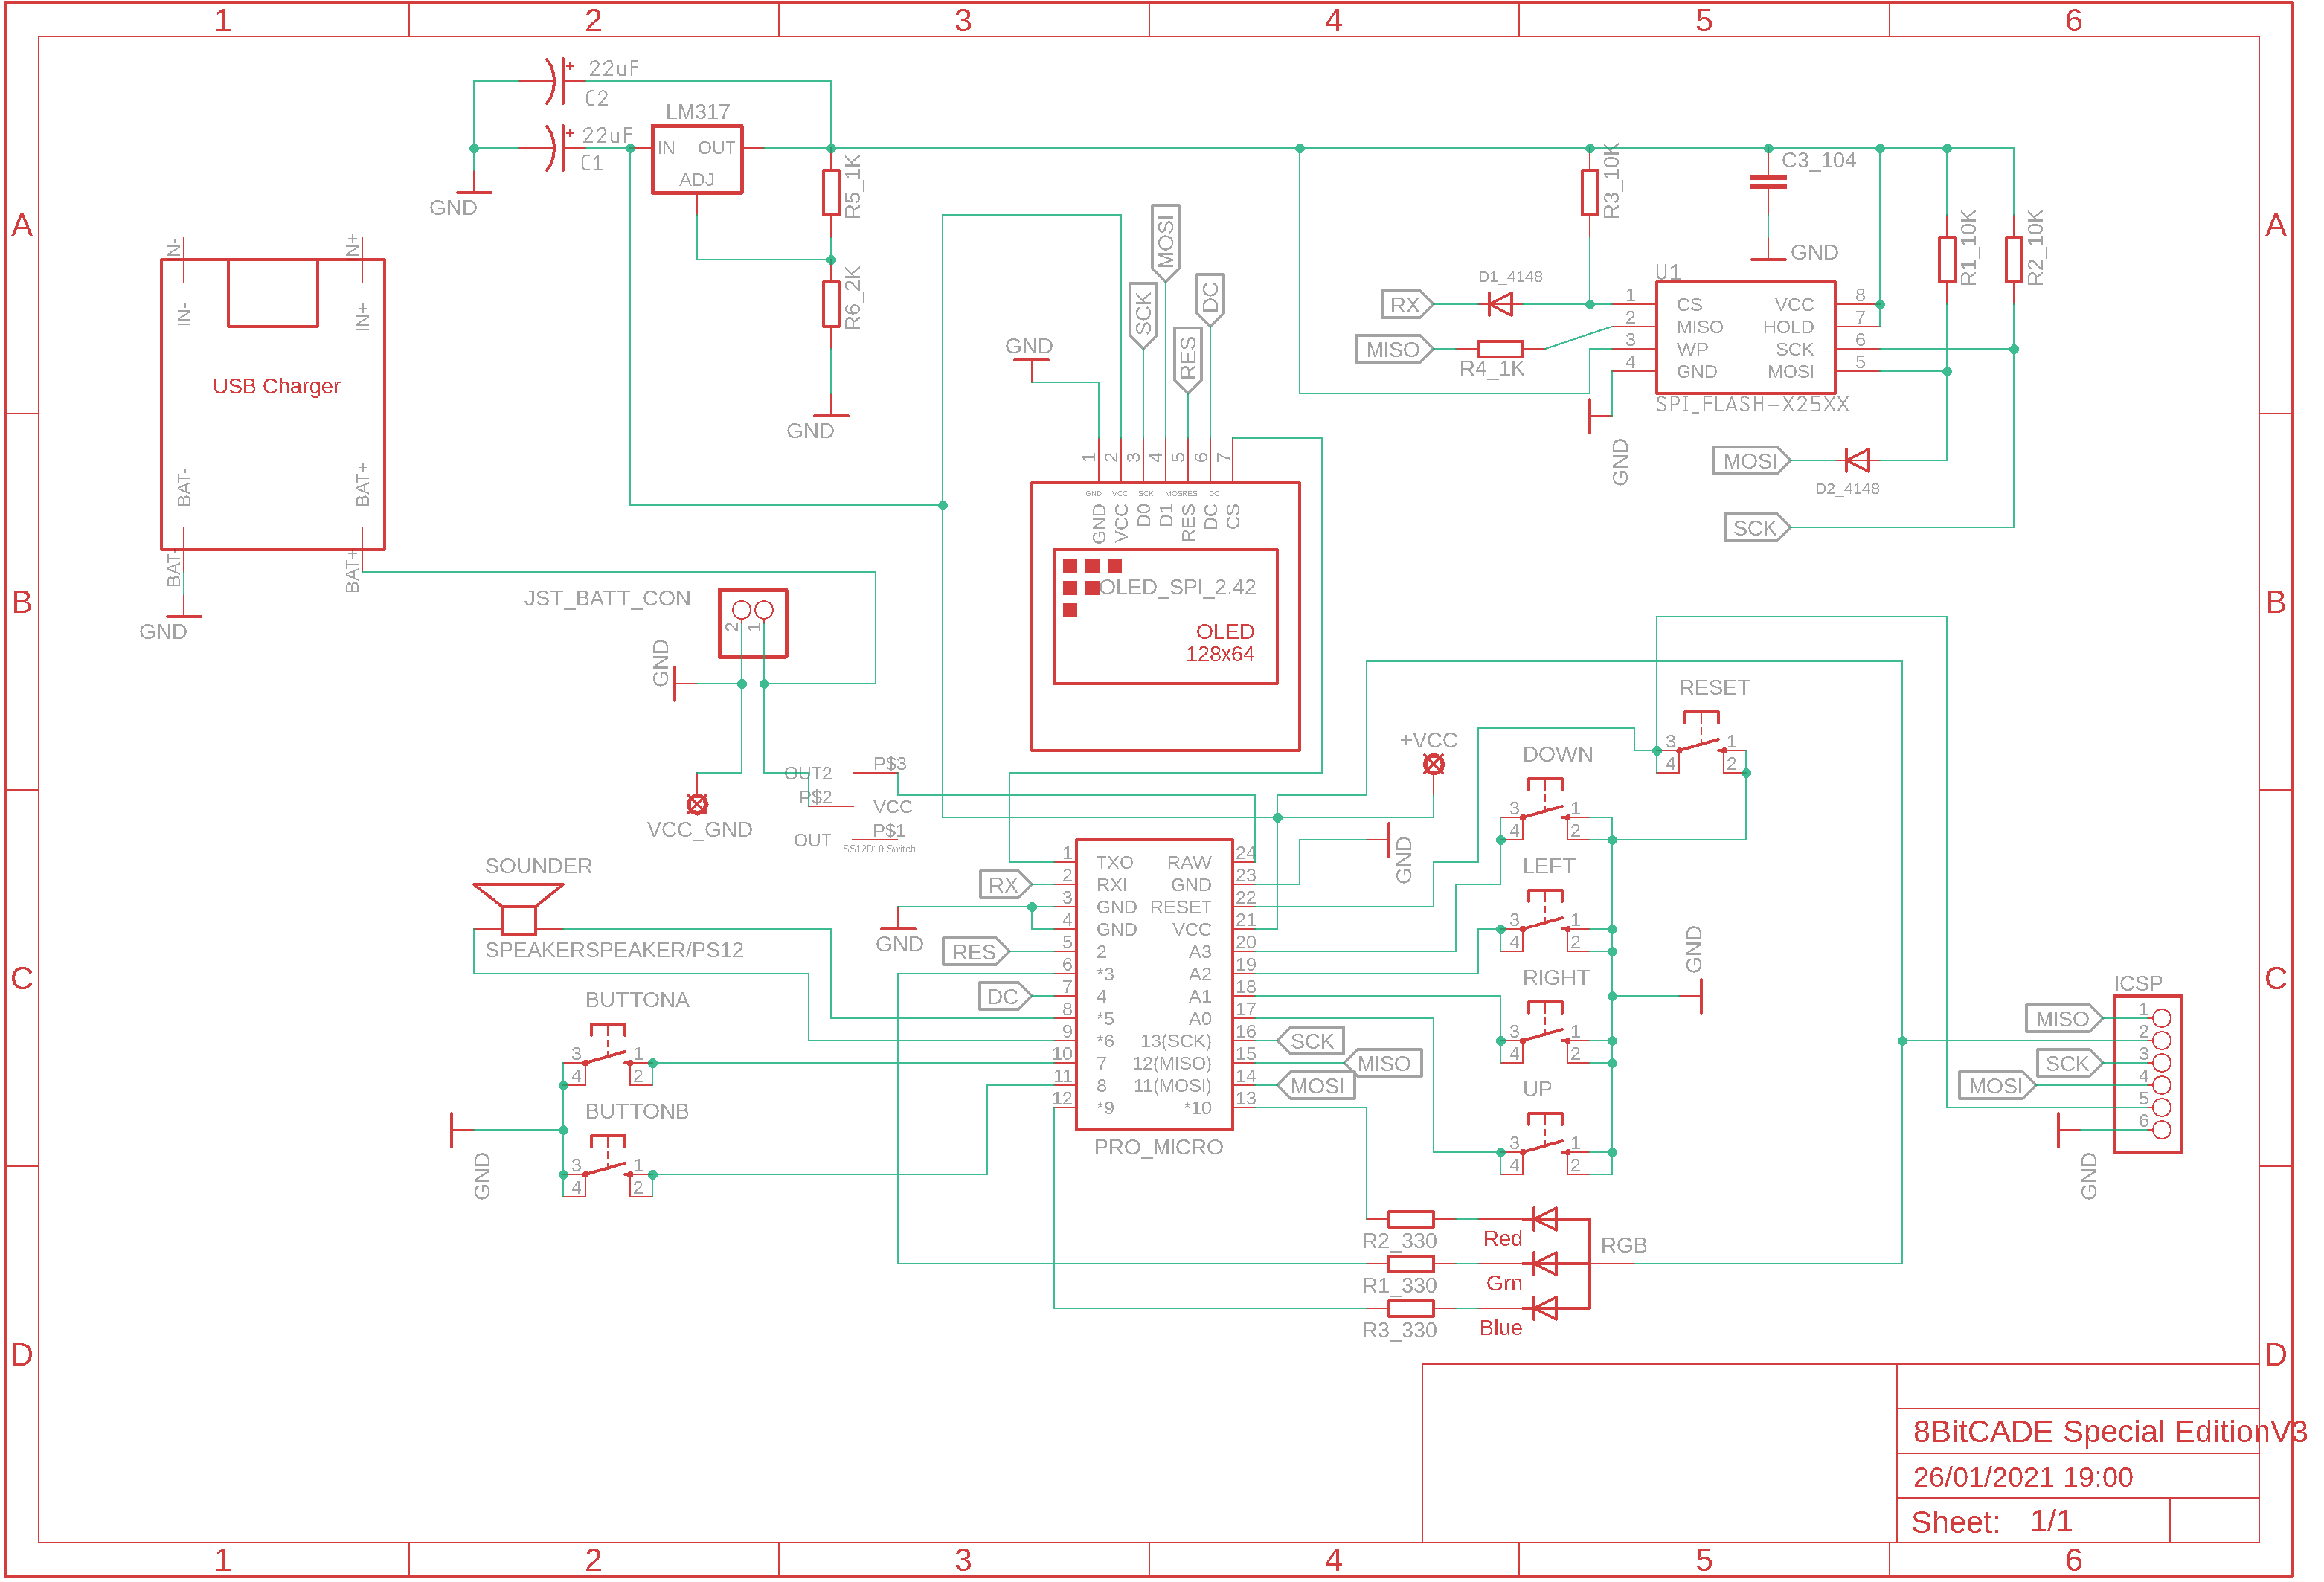
Level UP Schematic
Scheme
Level UP Schematic
Documentation
Example Case!
Print your own case!
Example Case!
Example Case!
Print your own case!
Example Case!
Comments
Only logged in users can leave comments