Fighter Aircraft Like B-Scope Radar Display using Arduino
There are several kinds of display which looks cool and B-Scope is one of them. Commonly used in fighter aircrafts to display the presence of targets in the form of Cartesian coordinates either in Range-Altitude Mode or Range-Azimuth Mode. This project will focus only on Range-Azimuth Mode display.
Devices & Components
1
Arduino Uno Rev3
1
10 jumper wires 150mm male
1
Jumper Male to Female 20 cm
1
Ultrasonic Sensor - HC-SR04
1
MG90 Micro Servo
1
Breadboard 100x160
Software & Tools
1
wokwi
Project description
Code
B_Scope
cpp
A Simple B Scope Display
Downloadable files
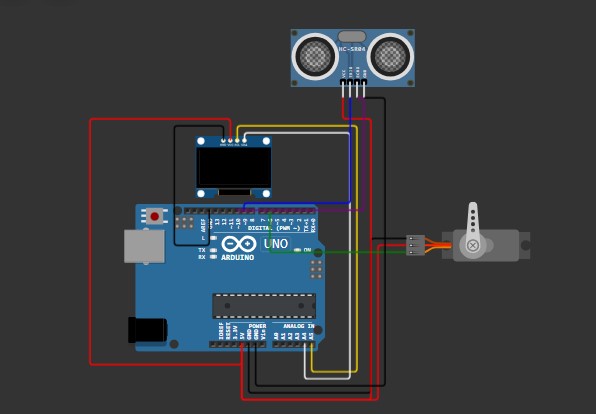
B Scope Circuit
Easy Circuit with less number of connections
Screenshot 2024-10-12 232641.jpg
Comments
Only logged in users can leave comments