Devices & Components
1
Sewable Conductive Thread
1
LilyPad ProtoSnap Plus
Software & Tools
Arduino IDE
Project description
Code
Project_3_YBG_blink2.ino
arduino
Blinking LEDs
1/*
2LilyPad ProtoSnap Plus Activity 1: Blinking LEDs
3SparkFun Electronics
4https://www.sparkfun.com/products/14346
5
6Blink  the pair of yellow LEDs attached to sew tab A5 on the LilyPad USB Plus
7
8Follow  the tutorial at: https://learn.sparkfun.com/tutorials/lilypad-protosnap-plus-activity-guide#1-blinking-leds
9
10This  example is based on: Blink by Scott Fitzgerald
11https://www.arduino.cc/en/Tutorial/Blink
12
13This  code is released under the MIT License (http://opensource.org/licenses/MIT)
14
15******************************************************************************/
16
17//  The setup function runs once when the microcontroller starts up or resets:
18
19void  setup()
20{
21  // Before you use a sew tab (pin), you must set it to be either  an input or output:
22
23  pinMode(A5, OUTPUT);
24  pinMode(A8, OUTPUT);
25  pinMode(A7, OUTPUT);     // Set pin A5 to be an output
26}
27
28// After the  setup function runs, the loop function runs over and over forever:
29
30void loop()
31{
32  digitalWrite(A5, HIGH);  // Give pin A5 a HIGH voltage level (on), which lights  up the LED
33  delay(1000);             // Pause for 1000 milliseconds (one second),  the LED stays on
34  digitalWrite(A8, HIGH);  // Give pin A8 a HIGH voltage level  (on), which lights up the LED
35  delay(800);             // Pause for 1000 milliseconds  (one second), the LED stays on
36  digitalWrite(A7, HIGH);  // Give pin A7 a HIGH  voltage level (on), which lights up the LED
37  delay(600);             // Pause  for 1000 milliseconds (one second), the LED stays on
38  digitalWrite(A7, LOW);   // Give pin A7 a LOW voltage level (off), which turns off the LED
39  delay(50);//  Pause for 1000 milliseconds (one second), the LED stays off
40  digitalWrite(A8,  LOW);   // Give pin A8 a LOW voltage level (off), which turns off the LED
41  delay(50);
42  digitalWrite(A5, LOW);   // Give pin A5 a LOW voltage level (off), which turns  off the LED
43  delay(50);
44}
45
Project_3_YBG_blink2.ino
arduino
Blinking LEDs
1/*
2LilyPad ProtoSnap Plus Activity 1: Blinking LEDs
3SparkFun Electronics
4https://www.sparkfun.com/products/14346
5
6Blink
7  the pair of yellow LEDs attached to sew tab A5 on the LilyPad USB Plus
8
9Follow
10  the tutorial at: https://learn.sparkfun.com/tutorials/lilypad-protosnap-plus-activity-guide#1-blinking-leds
11
12This
13  example is based on: Blink by Scott Fitzgerald
14https://www.arduino.cc/en/Tutorial/Blink
15
16This
17  code is released under the MIT License (http://opensource.org/licenses/MIT)
18
19******************************************************************************/
20
21//
22  The setup function runs once when the microcontroller starts up or resets:
23
24void
25  setup()
26{
27  // Before you use a sew tab (pin), you must set it to be either
28  an input or output:
29
30  pinMode(A5, OUTPUT);
31  pinMode(A8, OUTPUT);
32
33  pinMode(A7, OUTPUT);     // Set pin A5 to be an output
34}
35
36// After the
37  setup function runs, the loop function runs over and over forever:
38
39void loop()
40{
41
42  digitalWrite(A5, HIGH);  // Give pin A5 a HIGH voltage level (on), which lights
43  up the LED
44  delay(1000);             // Pause for 1000 milliseconds (one second),
45  the LED stays on
46  digitalWrite(A8, HIGH);  // Give pin A8 a HIGH voltage level
47  (on), which lights up the LED
48  delay(800);             // Pause for 1000 milliseconds
49  (one second), the LED stays on
50  digitalWrite(A7, HIGH);  // Give pin A7 a HIGH
51  voltage level (on), which lights up the LED
52  delay(600);             // Pause
53  for 1000 milliseconds (one second), the LED stays on
54  digitalWrite(A7, LOW);
55   // Give pin A7 a LOW voltage level (off), which turns off the LED
56  delay(50);//
57  Pause for 1000 milliseconds (one second), the LED stays off
58  digitalWrite(A8,
59  LOW);   // Give pin A8 a LOW voltage level (off), which turns off the LED
60  delay(50);
61
62  digitalWrite(A5, LOW);   // Give pin A5 a LOW voltage level (off), which turns
63  off the LED
64  delay(50);
65}
66
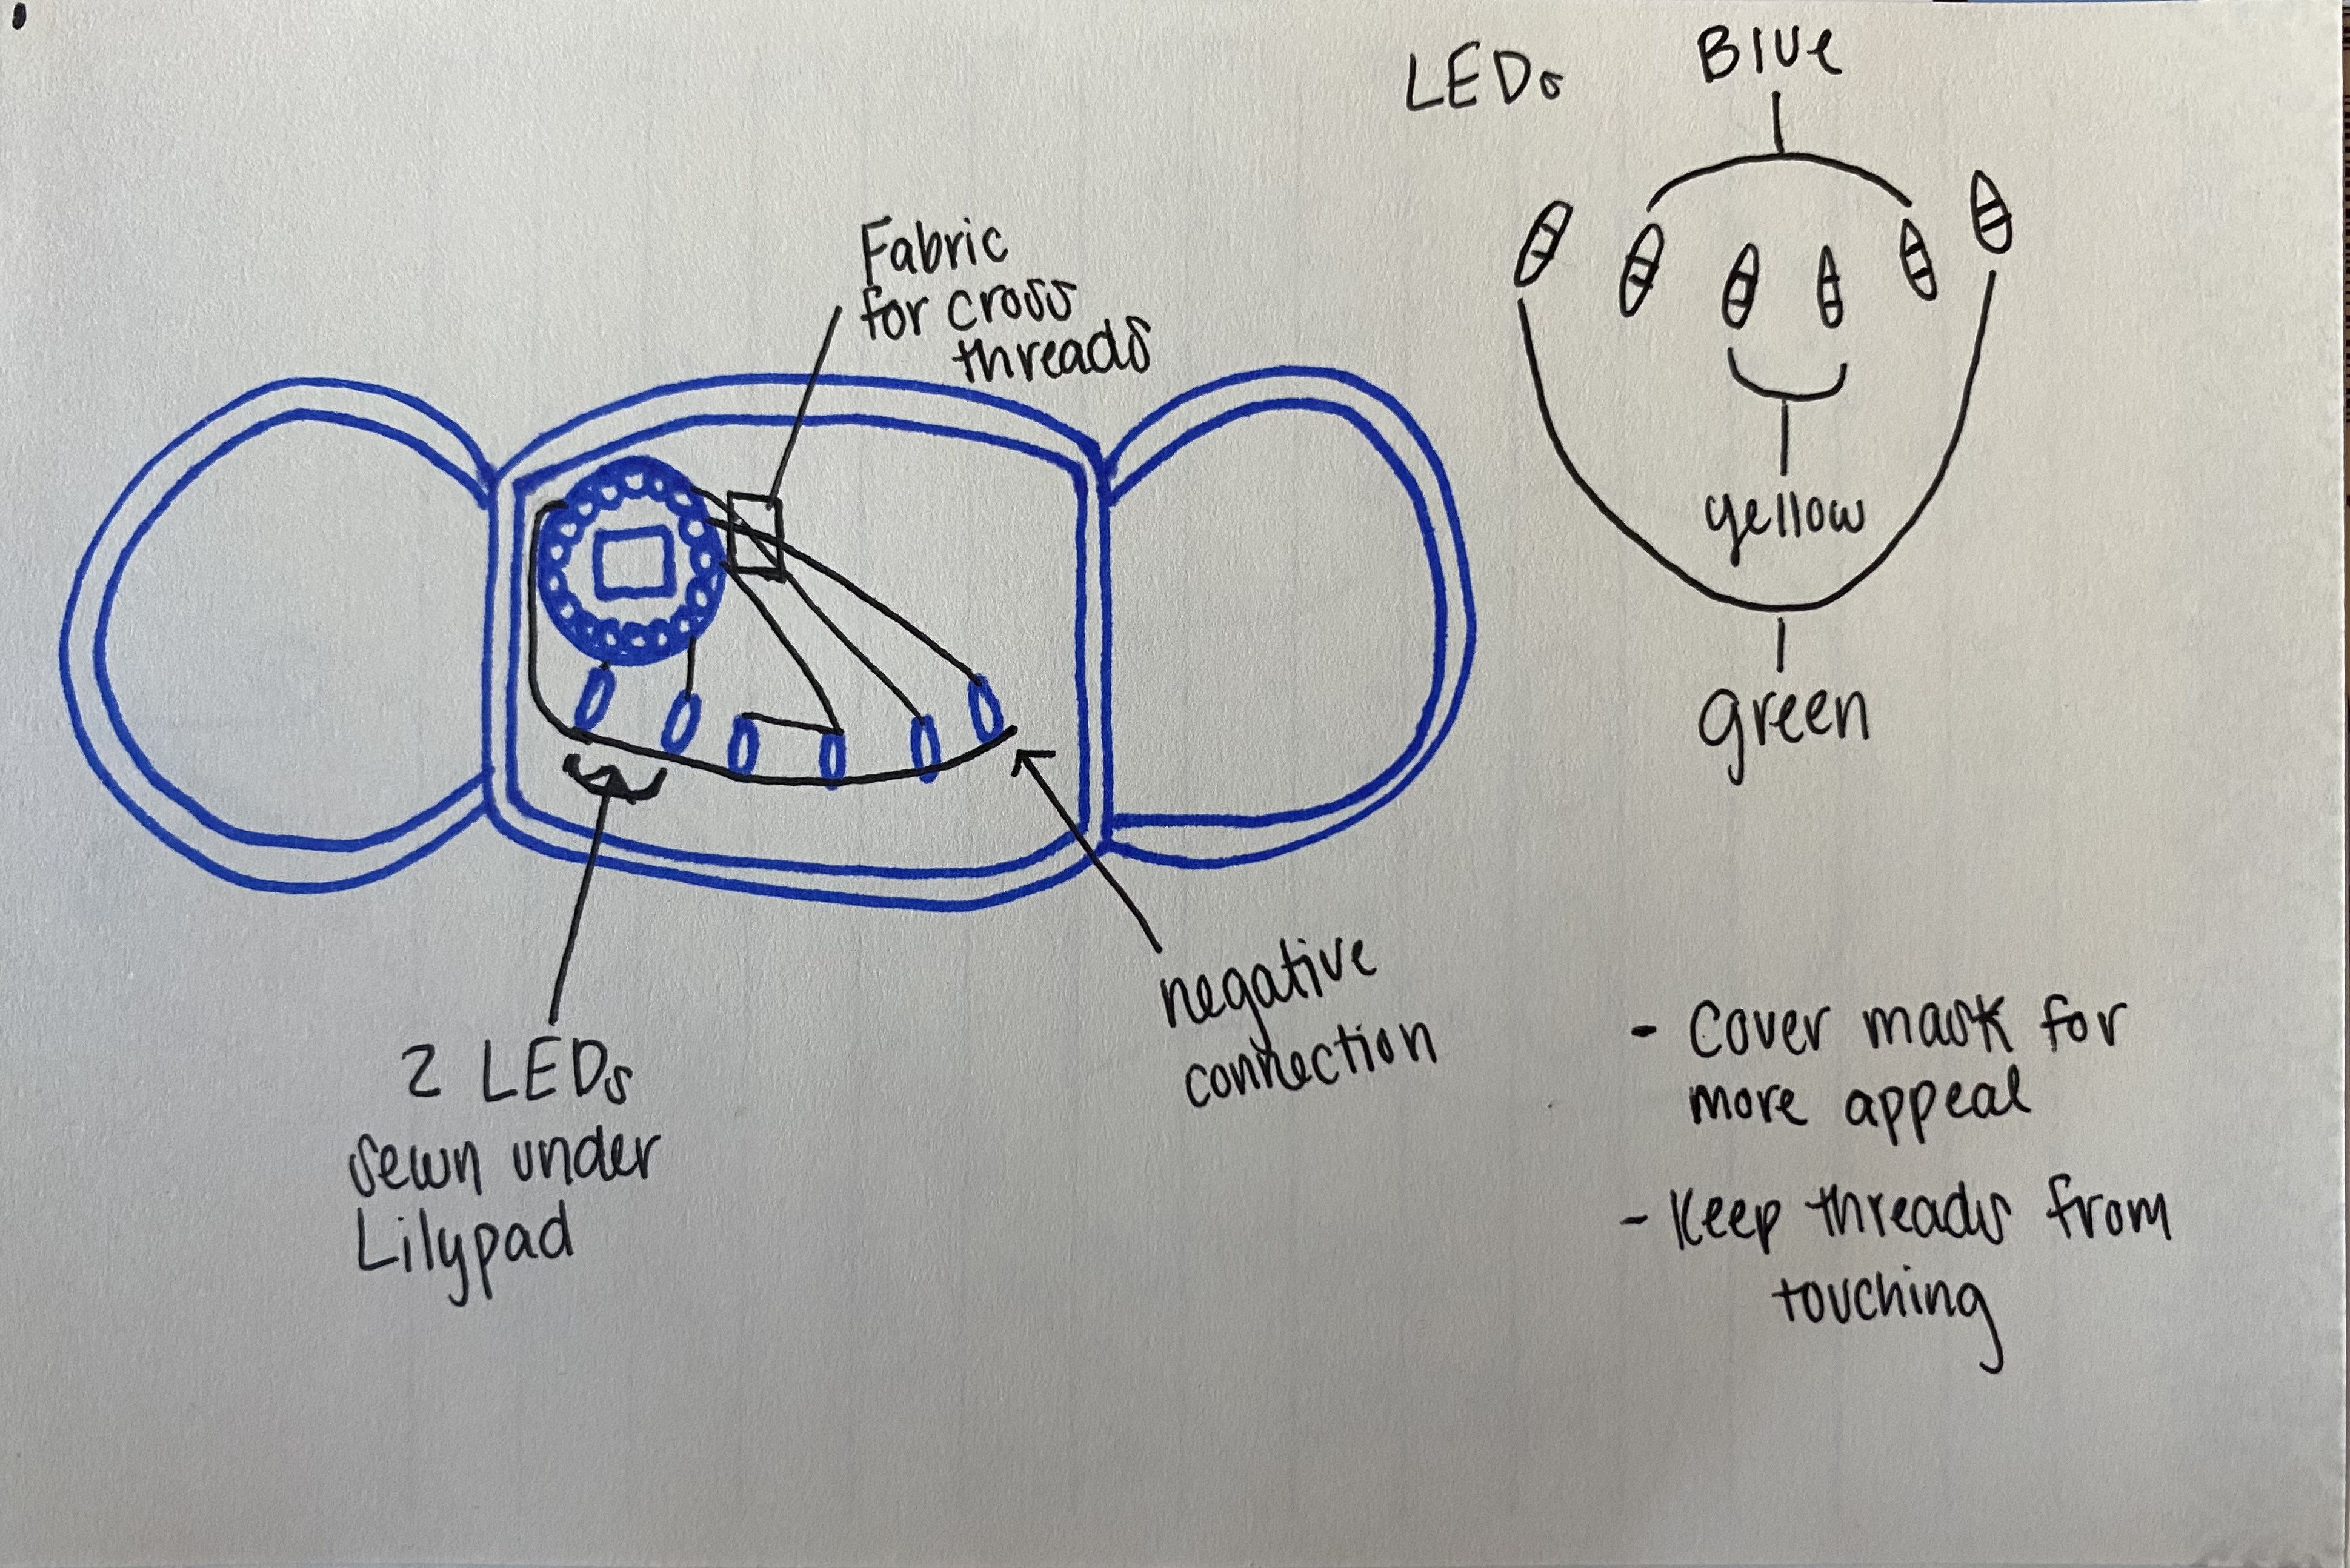
Downloadable files
Smile Mask Circuit Plan/ Diagram
Smile Mask Circuit Plan/ Diagram
Comments
Only logged in users can leave comments